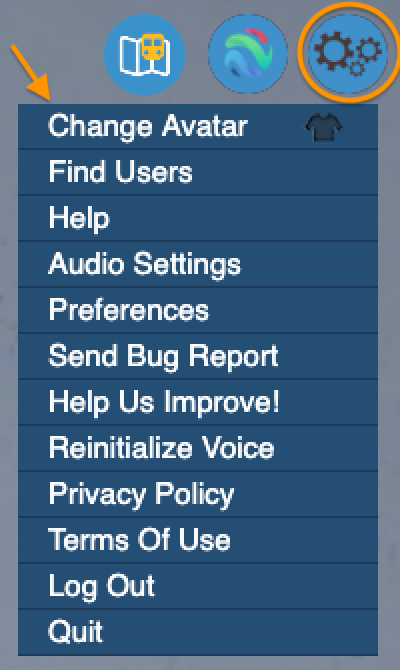
The first time you enter Virbela, you will be prompted to set up an avatar. This avatar is a representation of yourself in our virtual world! At any time you can also click the gear icon in the upper right corner of your screen and select Change Avatar to change your outfit or how your avatar looks.
Virbela’s new avatar system offers enhanced customization options, providing greater representation and inclusivity for all. One of the significant benefits of the new avatar system is the ability for users to choose from a broader range of options, including additional skin tones and body types. The new system allows users to represent themselves better in the virtual world without restrictions and assumptions based on gender.
Let’s Start!
Are you ready to create your avatar? Before navigating through and exploring the world you’ll need to create an avatar to associate with your username.
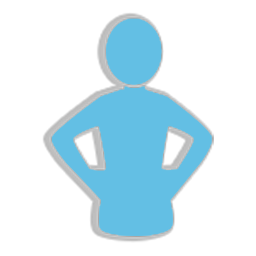
When you’re creating your new avatar for the first time, please select a starter avatar that will serve as a starting point. You will then have access to the full range of customizations including preset/advanced body, hair, and head settings, in addition to a variety of clothing and accessories. When making a selection, the currently selected option will be outlined in blue. Only select the Finish button when you’re ready to enter the virtual world.
 Select Body
1. Body Shape
Choose from a variety of preset body shapes. To further adjust your avatar’s body weight and height, select Advanced Settings then click and drag the circle on the graph. Underneath the graph, there are slider controls to further customize the body shape.
2. Skin Tone
Choose from a variety of preset skin tones. To further refine your desired skin tone, click and drag the circle on the graph.
Tip: You can rotate your avatar a few ways – by clicking on the avatar and dragging side-to-side, by using the left and right arrow keys, and by using the A and D keys. Rotating your avatar to a profile view allows for a better perspective when refining customizations.
Tip: You can zoom by clicking on the magnifying glass icon in the bottom right corner of the screen.
 Select Hair
3. Hair
Choose a hairstyle and select your primary color. Then, select a primary and optional secondary color. Or, you can choose the bald/shaven option.
4. Facial Hair
Choose a facial hairstyle, if desired. Then, select a primary and optional secondary color. Use the slider control to adjust the stubble amount.
6. Eyelashes
Choose an eyelash color and select the desired length for your eyelashes.
Tip: The hair’s primary color automatically assigns your facial hair, eyebrow, and eyelash primary color. However, these colors can be separately adjusted if desired.
 Select Head
7. Select Head Shape
Choose a preset head shape option. You can select Advanced Settings to adjust characteristics like your chin length and width by clicking and dragging on the circle on the graph. Use the slider controls to further refine your customizations like age, jaw depth, chin depth, and cheeks. Use the radio button to turn on/off a chin cleft.
8. Eyes
Choose a preset eye shape option and select your eye color. Then select Advanced Settings to click and drag the circle on the graph to adjust the eye position. Use the slider controls to adjust how open or closed the eyelids are, overall eye size, and upturn or downturn of your eyes.
9. Nose
Choose a nose shape option. Then select Advanced Settings to adjust size and shape by clicking and dragging the circles on the graphs. Use the slider controls to further refine your nose. See tips below.
10. Lips
Choose a lip shape option. Then select Advanced Settings to adjust settings like your lip size and width.
11. Ears
Choose an ear shape option. Then select Advanced Settings to adjust settings like your ear size, depth, and length.
12. Cosmetics
Choose eyeshadow, blush, lip, and nail colors and amounts, if desired.
Tip: Selecting the 🚫 button simply removes the cosmetic color.
Tip: In “Advanced Settings” for the Nose subtab, if customizing Nose Root Depth rotate your avatar to the side to see the effect of the customization. For the Nose Bridge customizations, watch the middle section of the nose as these changes may be subtle.
Tip: After adjusting your nose, it can be helpful to revisit the Eyes subtab, particularly in Eye Position under Advanced Settings, for further fine-tuning.
Tip: When adjusting the ears, turn your avatar to both face-forward and profile views to see the effect of the customization.
 Select Apparel
13. Tops
Choose a top or top/jacket combination, then select your colors.
14. Bottoms
Choose a bottom option, then select your colors.
15. Shoes
Choose a pair of shoes, then select your colors. The high-heel options will increase the height of your avatar.
ip: Jackets are automatically paired with a shirt underneath. If you select a jacket, you will not be able to change the shirt that is underneath it.
Tip: Each apparel and accessory may have up to 4 different coloring options available on each asset. Try to mix and match colors to create a uniquely curated outfit!
Tip: The options in the Apparel and Accessories tabs all share a similar color selection menu at the bottom of the screen. Select an option (e.g., a shirt) and then customize using available color options for its primary color, and secondary and accent colors, if available. For an advanced guide for color options click here.
 Select Accessories
16. Hats
Choose a hat, then select your colors. A selected hat could slightly reshape your selected hairstyle.
17. Eyewear
Choose eyewear, then select your colors.
18. Earrings
Choose an earring style, which ear(s) you’d like to wear it on, and then select colors.
19. Neckwear
Choose neckwear, then select your colors.
20. Wristwear
Choose a wristwear option and which arm you’d like to wear it on. Then, select your colors.
Tip: Selecting an accessory is optional and selecting the 🚫 button removes the accessory.
Tip: The options in the Apparel and Accessories tabs all share a similar color selection menu at the bottom of the screen. Select an option (e.g., a hat) and then customize using available color options for its primary color, and secondary and accent colors, if available. For an advanced guide for color options click here.
Let’s Finish!
Are you happy with your avatar’s look? When you are finished customizing your avatar, select the Finish button to proceed to the virtual world!
Remember at any time you can return and update your avatar again by clicking the gear icon in the upper right corner of your screen and selecting Change Avatar