
Open Broadcast Software is free and open-source software for video recording and live streaming. OBS is a third-party application and operates independently from Virbela. To use OBS to record Virbela, you must first download and install the software from their website. On their main page, you can select the download link for your respective hardware. Once it is downloaded, install and open the software.
Note: It is recommended to have two monitors available when using OBS to record or live stream. Some functions of the software differ between operating systems. This example is for PC ONLY.
Setup:
- Open OBS
- Select File from the top left of the screen.
- Select Settings from the drop-down menu.
- Select Output from the options on the left of the new window
- In the Streaming section, adjust these fields to the following settings.
Video Bitrate: 4500 Kbps
Encoder: Software (x264)
Audio Bitrate: 160
- Adjust the Encoder setting of the Recording section to Software. (x264)
- Select Apply to save those settings.
- Select Video from the options on the left of the Settings window.
- Adjust the following fields to these settings:
Base (Canvas) Resolution: 1920 x 1080
Output (Scaled) Resolution: 1920 x 1080
Common FPS Values: 30
- Select Apply to save those settings and close the settings window.
- In the Audio Mixer section at the bottom of the OBS main screen, bring the volume faders for Desktop Audio and Mic/Aux all the way to the left until they are at -inf dB.
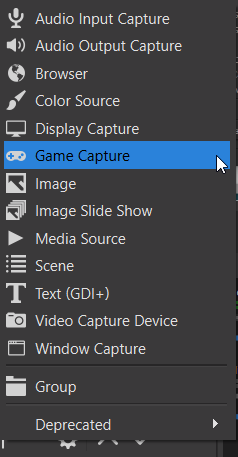
- In the Sources section to the left of the Audio Mixer section, select the plus symbol to add a new source.
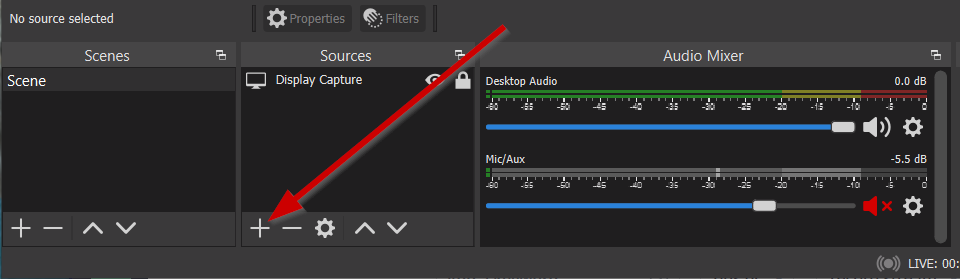
- Select Game Capture from the drop-down menu.
- In this window, you have the opportunity to rename the new source and select OK.
- Open the Virbela software.
Note: If you have access to two monitors, it is advised to run Virbela maximized on one and OBS on the other. While capturing Virbela in Game Capture mode, navigating away from the software does not interrupt the recording, making it possible to do it on one monitor if necessary.
- Open OBS again and open the Mode drop-down menu and select Capture specific window.
- Open the Window drop-down menu and select the Virbela software.
- Select OK to close the source menu.
- In the Sources section to the left of the Audio Mixer section, select the plus symbol to add another new source.
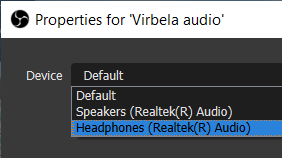
- Select Audio Output Capture from the drop-down menu.
- In this window, you have the opportunity to rename the new source and select OK.
Open the Device drop-down menu and select your main audio output device (i.e., headset, speakers, earbuds, etc.), and select OK.
Note: It is important to note that the Audio Output Capture will capture ALL outgoing audio from your computer. When recording or streaming, please turn off any notifications and do not run any other software that may play audio, as this will interrupt your recording or streaming.
- Activate the ‘Lock’ functions on both of the sources and you are all set!
Recording
Once setup is complete, recording with OBS is very simple. To record, click on the Start Recording button in the lower right corner of the screen. When it starts recording, that button will change to Stop Recording, which you can click to end the recording. All recordings will be saved to your video folder or whatever custom destination you selected in the settings. To view your recordings you can select File from the top left corner of the screen, and you can select Show Recordings.
Streaming
Streaming Virbela is made easy using the OBS software. If you intend to play the stream back within Virbela, it is recommended to stream to YouTube Live, but you can also stream OBS to other platforms such as Vimeo and Twitch. Setting up Virbela within a YouTube Live stream using OBS is as follows:
- Go to Youtube and login to or create an account.
- Once logged in, select the Create Camera icon in the top left corner of the YouTube page.
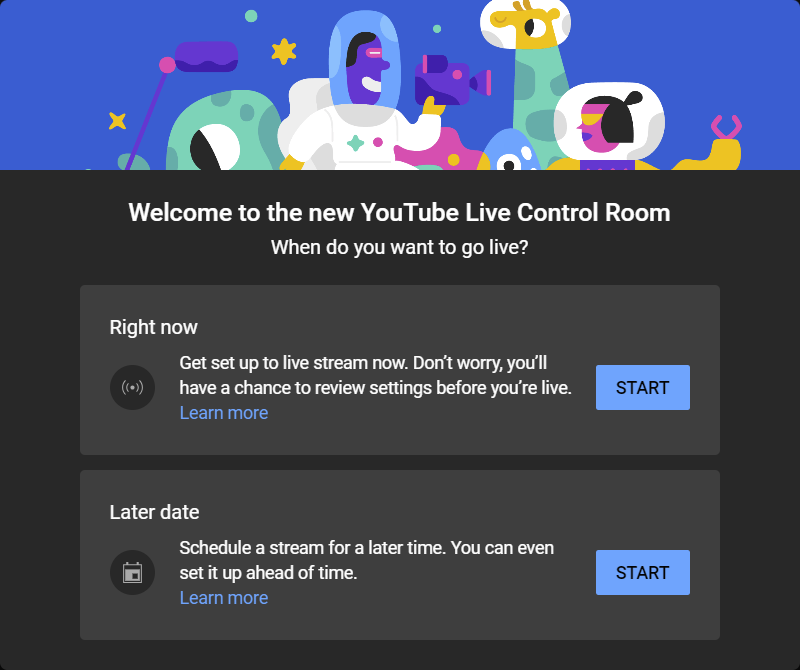
- Select Go Live.
Note: If this is your first time live streaming on this YouTube account it is important to complete this step 24 hours before you plan to stream.
- Select whether you want to start live streaming right now or at a later date that you can schedule.
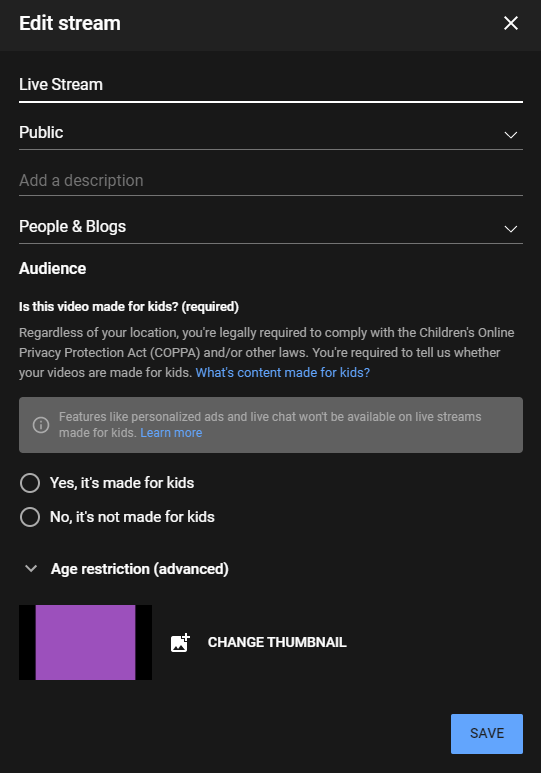
- Select Streaming Software from the second menu.
- Fill out the various fields relating to how you would like your live stream to be viewed, upload a thumbnail image, and click Save.
- Copy the Stream Key from the YouTube Live Set-up page.
- Open OBS and select File from the top left of the screen.
- Select Settings from the drop-down menu.
- Select Stream from the options on the left of the Settings window.
- In the Service drop-down menu, select YouTube - RTMPS
- Paste the previously copied Stream Key into the Stream Key field and click apply.
- Select Start Streaming from the bottom right hand corner of the OBS main page to start broadcasting to YouTube.
The Live Stream begins here. You can grab the link from the share button at the top right of the YouTube Live page and share it with anyone. To play back a live stream in Virbela, please paste the link into any web board.