
Purpose
This document provides the steps for resellers to create private spaces on their campus. The functionality described below will produce the following outcomes:
- Create a passcode-protected private space in the reseller’s campus
- Send an email to the private space owner inviting them to the private space (the passcode is included in the email)
- Add the private space owner to the campus (if they are not already a member)
Requirements to create private spaces
For the reseller to create a private space, they must have the following:
- Product API must be enabled for their campus
- Product and pricing setup for the type of private space needing to be created (e.g., Team Suite for 20 users)
Resellers should contact their account manager with any questions or concerns regarding these prerequisites.
Steps to create the private space
Campus owners and administrators can create private spaces using the space creator tool in the Virbela dashboard.
Step 1 : log in to the Virbela dashboard and click on “Space Creator”
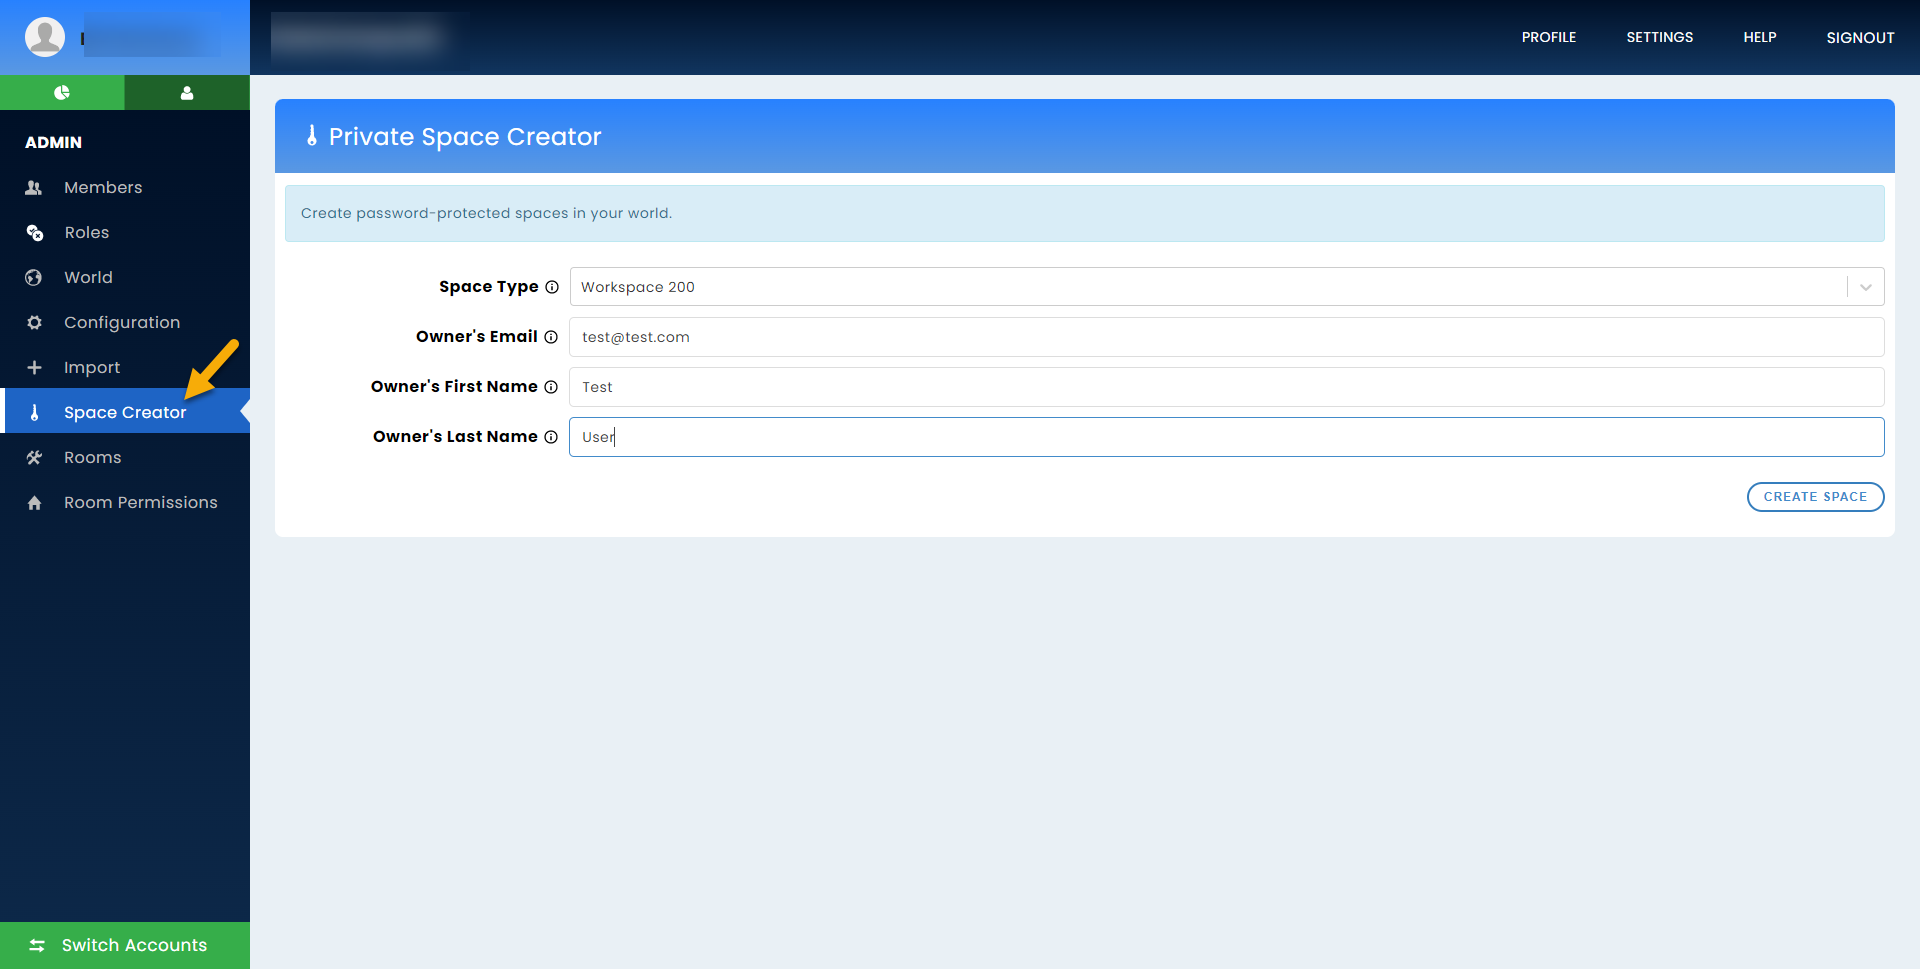
Step 2 : enter the details of the private space
First, select the space type from the drop-down list. If the requested space does not appear, please get in touch with the Virbela account management team.
The number at the end of the space represents the maximum number of concurrent users who can access the space at the same time. For example, “Workspace 20” means that 20 users can simultaneously be in this specific workspace.
Next, enter the email, first name, and last name of the subscriber. The subscriber is whoever purchased the private space. An email will be sent to this address once the form is submitted to invite the subscriber to the private space.
Finally, click “Create space.”
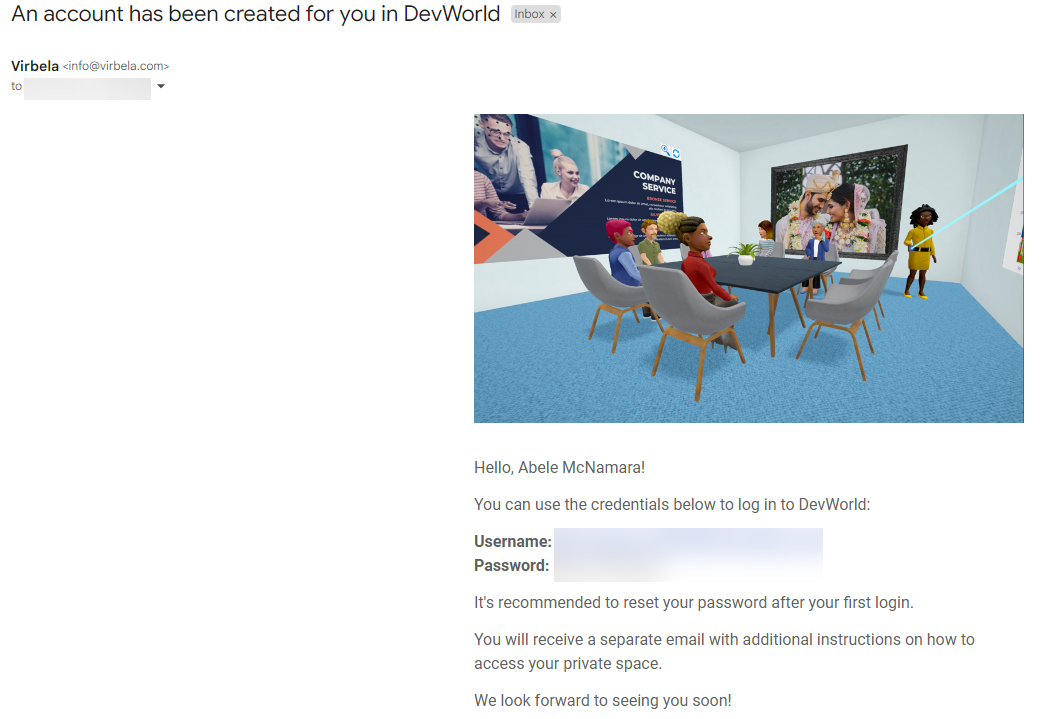
Step 3 : subscriber receives an email with a passcode
The subscriber will receive an email immediately after the above request is submitted. The subscriber should check their junk/spam folder if they do not receive the email.
The email will contain the passcode to enter the private space. The subscriber can share this passcode with their guests so they can enter the space as well.

In addition, if the subscriber is not yet a campus member, they will be automatically added as a member. Their credentials will appear in the email, as shown in the box below. The subscriber can use these credentials to log in to the campus.
Step 4 : subscriber can now enter the private space
The subscriber can log in to the campus. They can click GoTo and select “private room.”
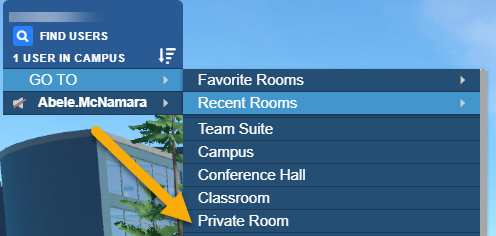
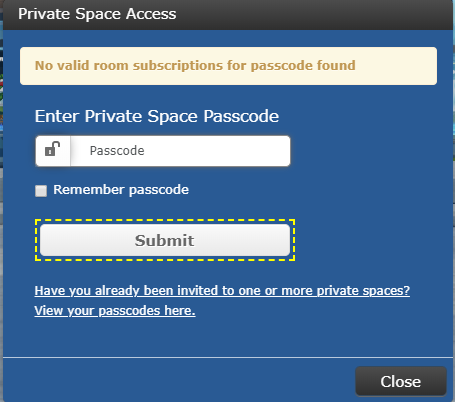
A prompt will appear. The subscriber should enter the space passcode in the prompt.

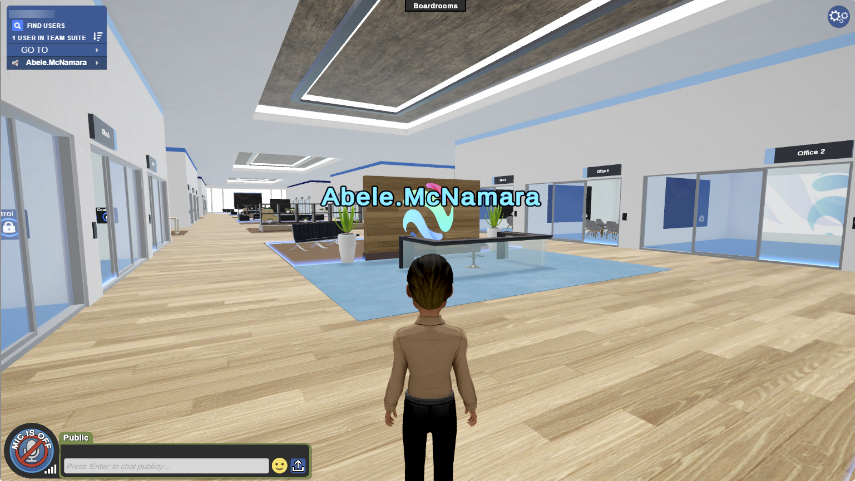
The subscriber will be teleported to their private space.
Viewing all private spaces on the campus
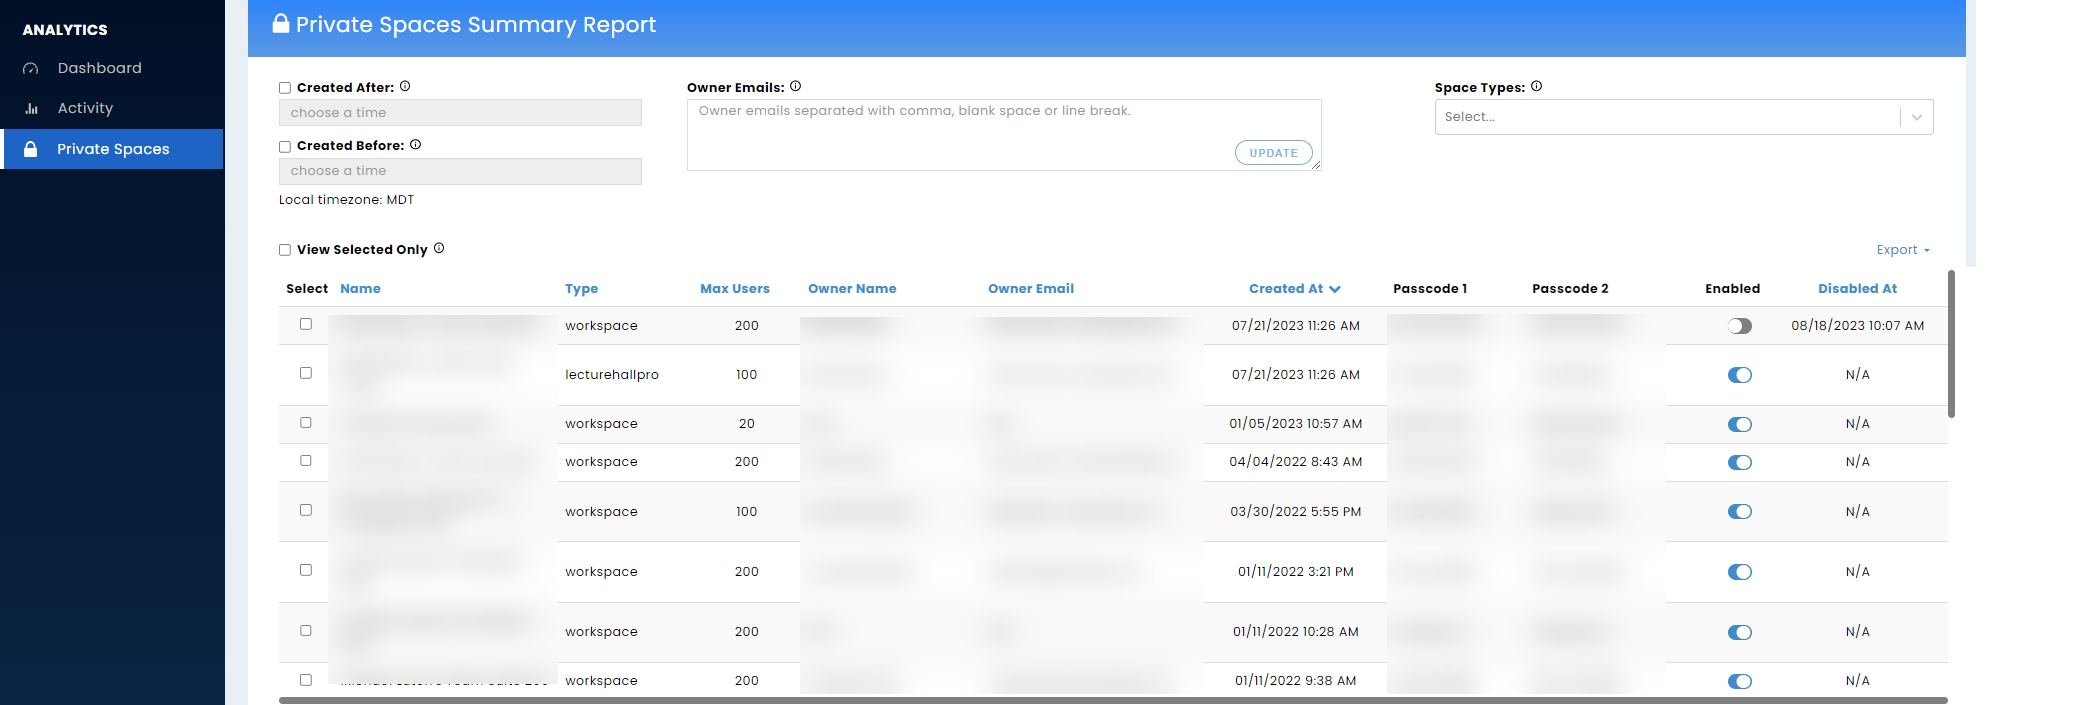
Campus owners require visibility to the private spaces available on their campus. Campus owners can log into the Virbela dashboard and find a private space report under analytics.
This report shows a list of all private spaces on the campus, the primary owner of the private space, and the passcodes. Campus owners can export this report into a CSV file. All private spaces are shown, even those deactivated.
Deactivating a private space
Campus owners can deactivate a private space by toggling off the “enabled” column. If a user tries to access a private space that is turned off, the user will receive this message (even if they are the private space owner):
The private space can get turned back on the same way. The system will preserve all data.