
The following are new or revised features and functionality that have been implemented as of January 25th, 2023. Note that as these are applied to the Virbela dashboard website, no update is required to your private campus for them to take effect!
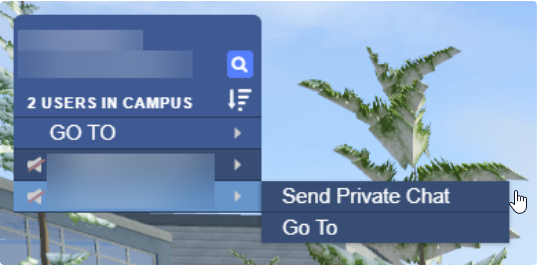
In the user search menu, users can click the name of another user and spawn in that location
Virbela wants to make it easier for users to get where they need to go. We are introducing new functionality that allows users to find other users and spawn close to where those users are located.
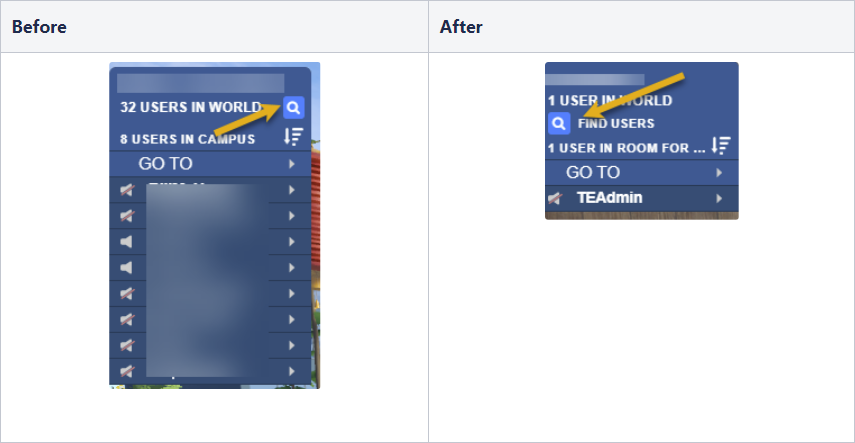
UI improvement to make it easier to see the search field
The magnifying glass in the GoTo menu was not the easiest to find. We update the user interface to make it more evident to users.
Administrative tools in app.virbela.com
Campus owners can control how the find user feature works in the role screen of app.virbela.com.
Campus owners have three types of permissions they can control:
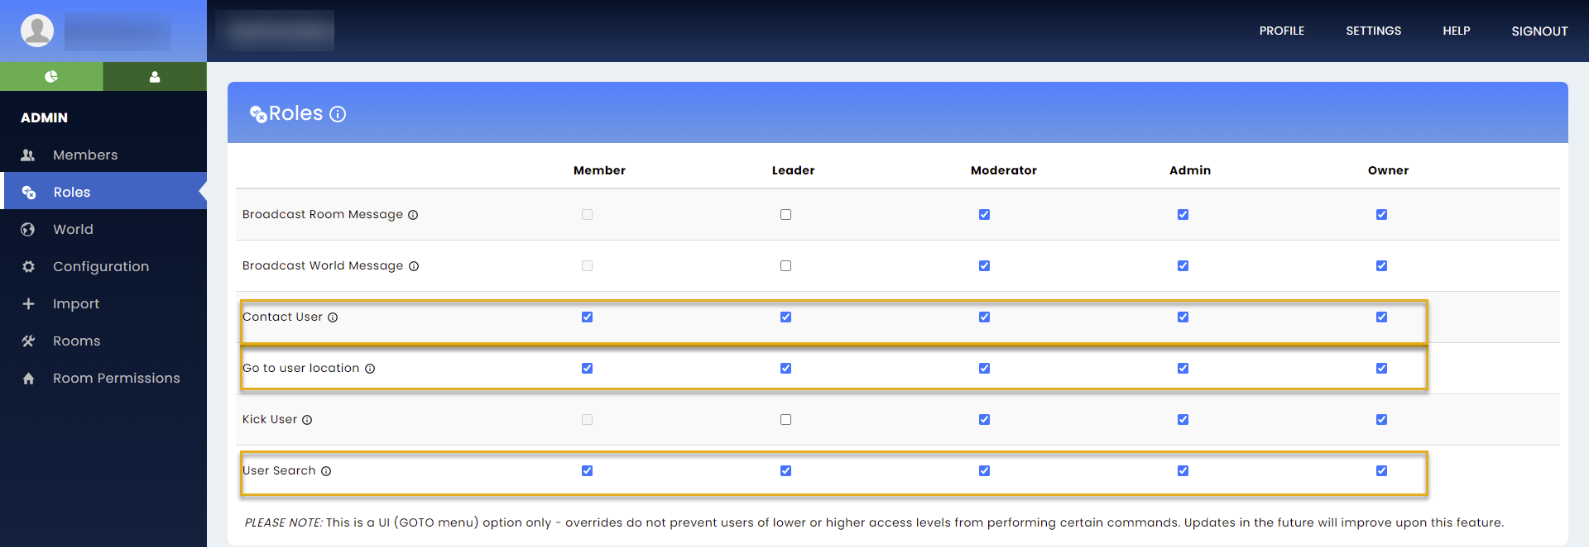
The user search option determines which roles can search for users. The “find user” function is hidden for roles without specific permission. This particular functionality was added with our 26 Oct 2022 release.
The go to user location option determines whether a role can spawn to the location of another user using the search tool—more on this feature below.
The contact user option determines whether a role can direct message other users through the “find users” window.
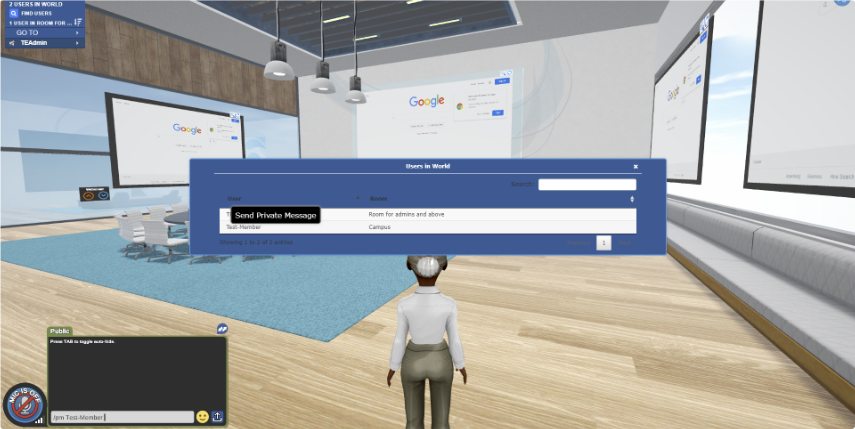
This feature only prevents users with that role from using the chat feature to direct message users in different rooms, and it will NOT prevent users from direct messaging other users in the same room.
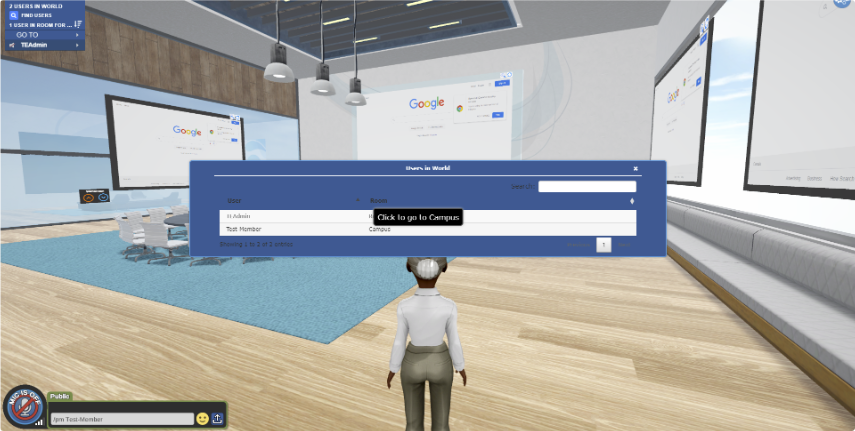
Spawning to the location of another user
Users can use the “find user” tool to search for users as they have in the past. They can select the user's room if they have the correct permission. After making the selection, the user will spawn in that room.
This functionality will only take the user to the spawn point of the room, not directly to the user. Virbela is working to continue to improve this feature.
Users can only spawn into a room if they have the proper role and team ID. If they do not have the appropriate permission, they will remain in their current scene and receive this message:

Users cannot use this feature to access passcode-protected rooms. Instead, they will see a user in a private room and cannot spawn where the user is.
If a user wants to access a passcode-protected room, they will need to enter it through the GoTo menu as they have done before.

Users can now save rooms to a favorites folder
We created new functionality to make it easy for users to save their favorite rooms into a folder. This helps users navigate the campus much faster.
In this initial release, users can only add rooms visible in the GoTo menu to their favorite folder. We will release additional functionality in February 2023 to allow users to add rooms not available in the GoTo menu (e.g., only accessible via a door).
Setting up the favorite room feature
The favorite room folder is disabled by default. Campus administrators can access the world tab in app.virbela.com to enable the favorites folder.
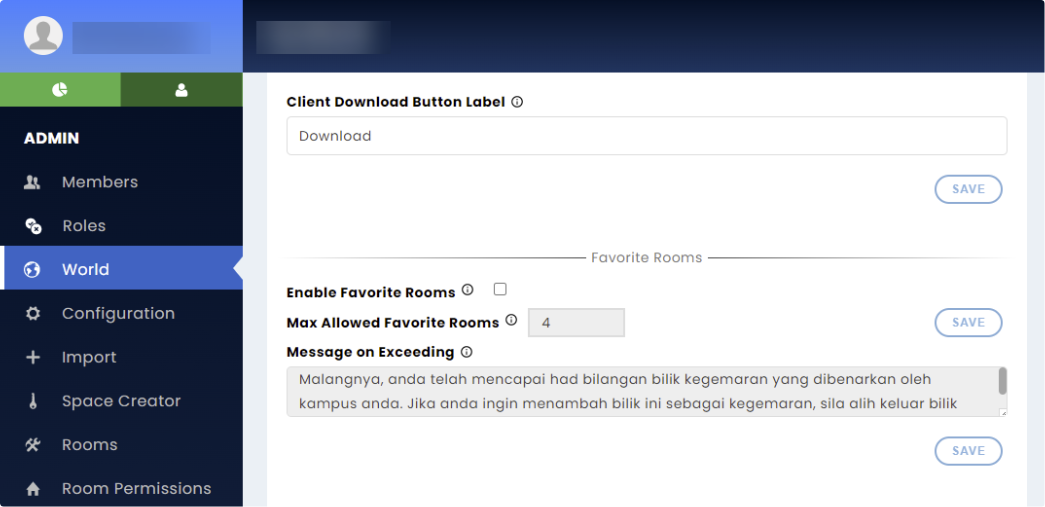
To enable, click the checkbox next to “enable favorite rooms.”

Campus administrators can now set the maximum number of rooms users can add to their favorites folder. The administrator can also choose what error message a user will receive if they exceed this limit. Once a user hits this limit, they cannot add additional favorite rooms until they remove a room from their favorite list.
Campus administrators must click save before these changes take effect.
In the above example, users can add four rooms to their favorite list. If a user tries to add a fifth room, they will receive the error message:

Campus administrators cannot allow users to save more than 50 rooms in their favorites.
Campus administrators can deselect the checkbox to disable this feature.
Adding rooms to the favorites folder
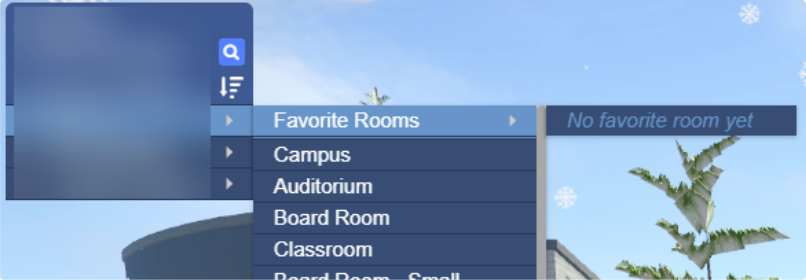
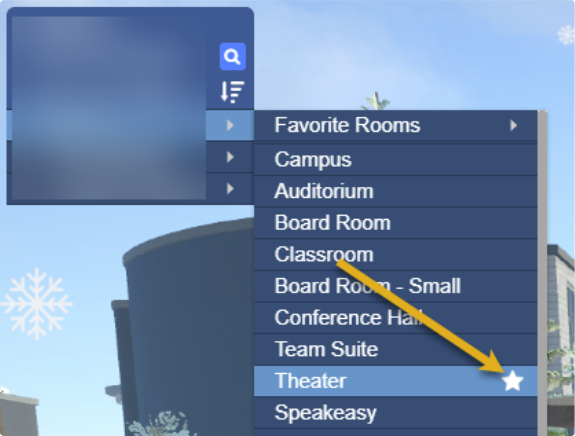
Users who join the campus after the favorites feature is enabled will see the favorites folder. The folder is empty initially.
When a user moves their mouse over a room, an outline of a star will appear.
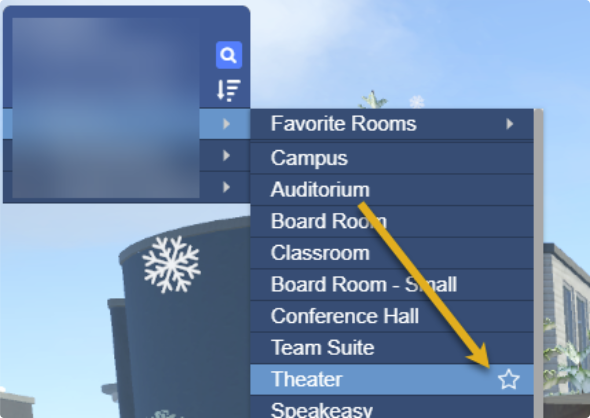
Clicking on the star will add the room to the favorites room folder.
Removing a room from the favorites folder
Users can remove a room from the favorites folder one of two ways.
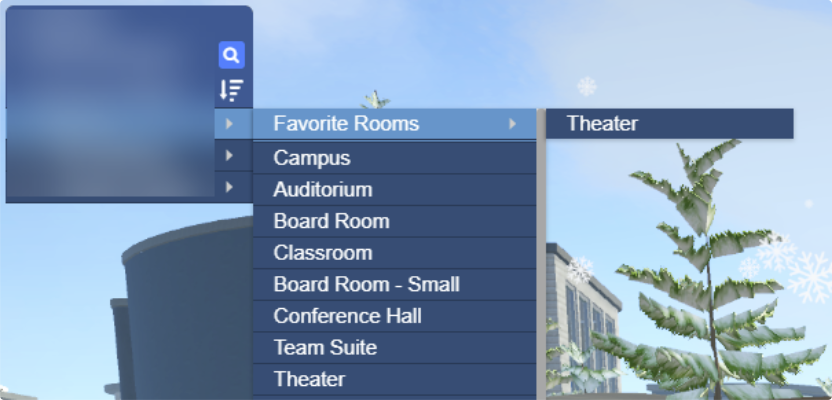
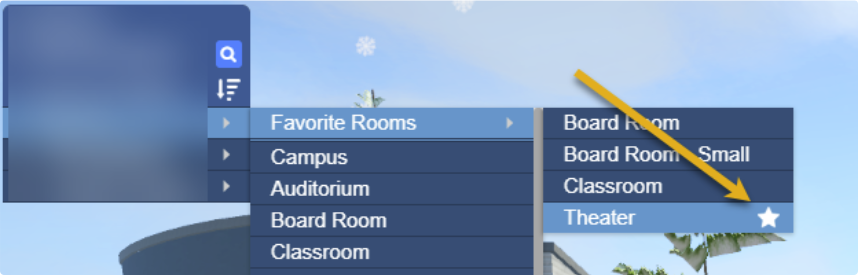
First, they can hover over the room name in the GoTo menu. The star outline is filled, and the user can click on the star. This will remove the room from the favorites folder.
Alternatively, the user can go to the favorites room folder and hover over the room's name. The star outline is filled, and the user can click on the star. This will remove the room from the favorites folder.
Allow customers to create links to their documents in the gear menu
Sometimes customers want to provide their users with more documentation specific to their company (e.g., privacy policy). With this new feature, customers can create links to documents in the gear menu in Virbela.
http://app.virbela.com">Administrative tools in http://app.virbela.com
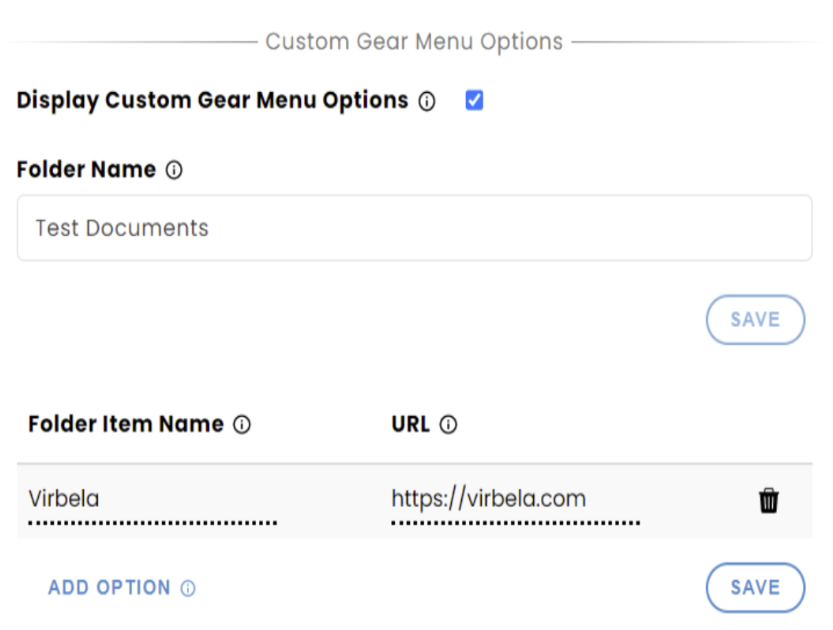
Campus administrators can add links to the gear menu by going to the world screen in http://app.virbela.com . The administrator can check the “display custom gear menu options”.
Administrators can name the parent folder of the links under “folder name.” This name will appear in the Gear menu.
Administrators can then add multiple links to the Gear Menu. The “folder item name” will appear in the Gear Menu under the parent folder, and the URL is the link the user will visit when they click the folder item.
Administrators can delete folder items using the trash can icon on the right side of the screen. Administrators can also hide the folder in the gear menu by unchecking the “display custom gear menu options” - this will hide the folder, not delete any information.
Administrators must click “save” to keep the changes.
By default, administrators can only add up to twenty (20) links. However, we can increase this amount by campus
User experience in Virbela
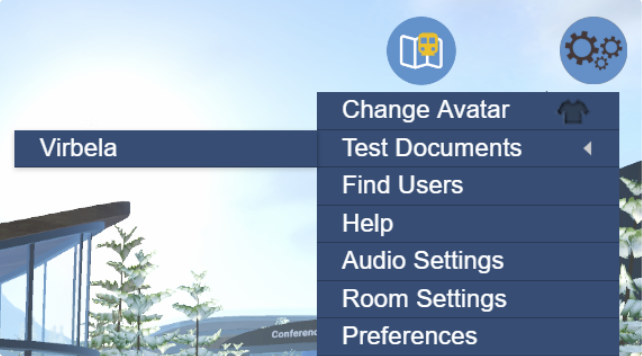
Users will see the parent folder when they click on the gear menu. Selecting the parent folder will show the folder items the administrator added. When a user clicks on an item, it will launch the URL in an outside browser.
Campus administrators can prevent the use of the profile page
Some of our customers prefer users not to share their personal information through their profiles. We have introduced functionality to allow our customers to choose to restrict profile information.
The setting is found in the world menu on app.virbela.com.
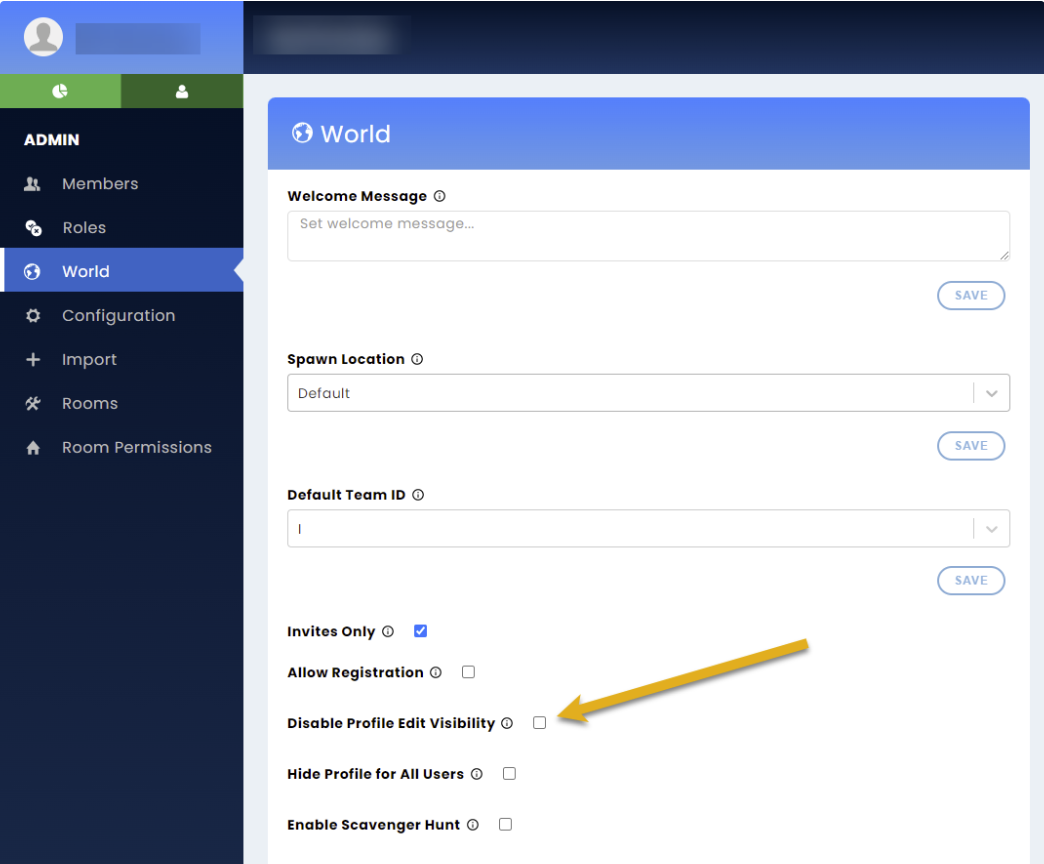
When this option is selected, users lose all visibility to their profile in app.virbela.com. In addition, they will no longer have access to other users’ profiles on campus.
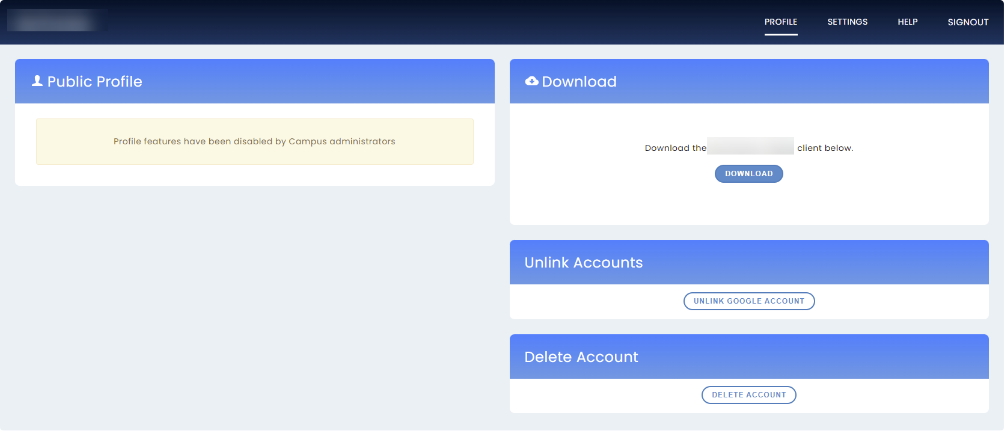
| When a profile is enabled | When a profile is disabled | |
| In app.virbela.com | 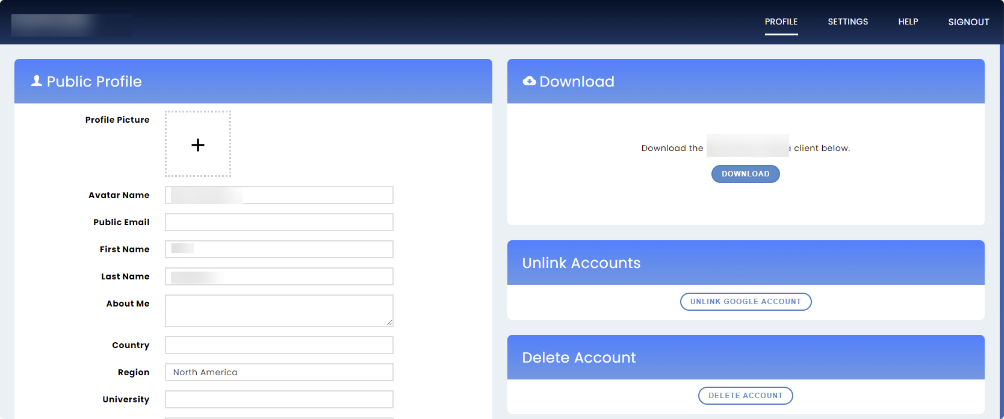 |
 |
| In Virbela desktop client | 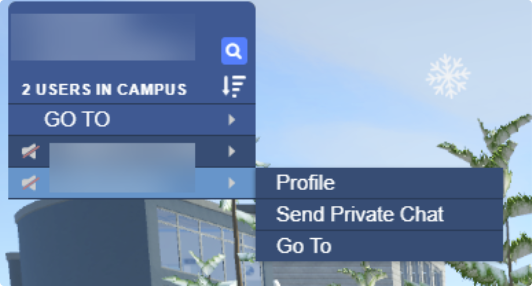 |
 |
Disabling the profile will prevent users from viewing and entering data in their profile. However, it will not delete the profile data.
In other words, if a user enters data into their profile, and the campus then disables the profile feature, they will no longer see their profile or the profile of other users. However, if the campus re-enables the profile feature, the user will see the previously entered data.
If a user belongs to multiple worlds, and one or more of those worlds allow profiles, the user can still edit their profile.
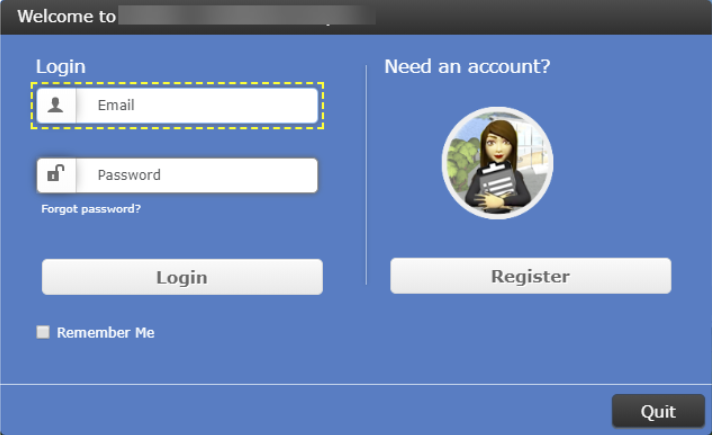
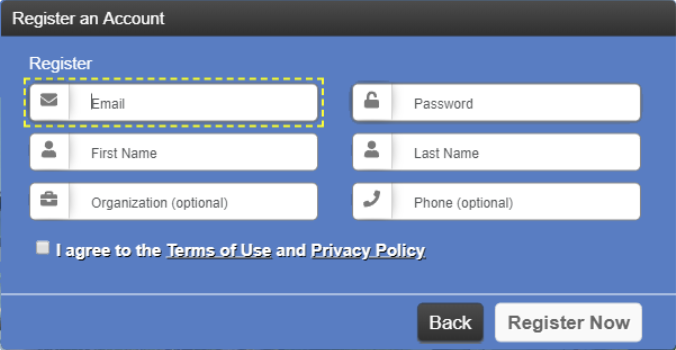
Improve accessibility by adding a focus to the login and registration screen
Virbela is committed to accessibility. One step towards this goal is to help users understand what field their cursor is focused on. Users will now see a yellow outline around their working element, which will appear on both the login and registration screens.
Improve contrast within the Virbela UI layer
We upgraded the contrast for several windows through the application. We made the background color darker to help improve readability.
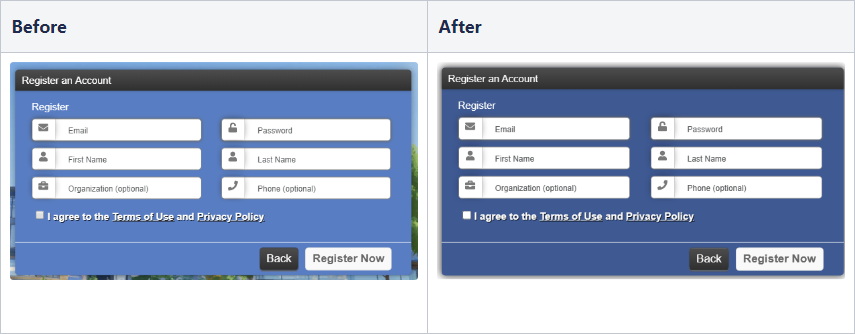
These changes we made in the following places:
- All confirmation dialogues
- User profile
- The message that pops up when users copy messages in the chat window
- Tooltips for Webboard buttons and options
- Icon to indicate a user is in a private volume
- Close the private browser button